Smokin-It Temperature Contoller Bypass

I picked mine up at Menards but I'm sure any that advertise 40-50+ below will do.  Looks like the amazon one should work.  I just used a 25ft one and cut what I wanted.
 
Ok, the cords have been purchased. I thought I had all the spade connectors I needed but I just rechecked my stash and I only have female ends and large spades. I'll just run up and grab some tomorrow after I pull the back off.

Question:
I am planning on changing the SI power cord to about a 6 footer for flexibility. I was also contemplating changing the power cord in the Auber to a 6 inch or 1 footer. That way it's a little easier to unplug the Auber and keep it inside without all the extra cord when not in use. I could then plug the Auber into a 15 ft 14/3 cold weather extension cord and keep that wound up on the back of the SI cord hook.

Thoughts?
 
Sounds like a good plan to me, Charlie!  Yep, everyone will have a personal preference.  No "right or wrong," just individual solutions to a challenge!
 
Of course. I just happy to get feedback. I had not even thought to change the power cord to a low temp cord until it was suggested here.

Thanks for the suggestion. I am excited to make a great smoker even better. For me  :)
 
Mission Completed and then some....

First and foremost...  Thanks to Polish Q & Wik for this thread as well as Johnny and the reset of the men that paved the way to the Auber mod.  It really made a task that could have made me very nervous (screwin up $700 in equipment) a very simple task.  I did take Pics to add on to the thread, but the pics they put up really made my job a lot easier.

I had a busy Saturday. 

I had always planned to bypass the controller when I purchased my Auber because it really does make for a more precise temperature control.  So this starts the first part of the post.  Bypassing the Auber.  It was certainly easy enough.  I think it took me more time to unscrew the back and take pictures than the actual work.  As others have said, its simple if you just have a jumper wire (14 awg.  I used the white wire from the plug since I was swapping that out) with two male spade connectors on it to bypass the SI temperature controller.  Thanks for the advice on the insulation.  I put on some rubber gloves and that seemed to help.


Attachments

  • bbq pics 17 2014-01-04.jpg
    bbq pics 17 2014-01-04.jpg
    157.4 KB · Views: 780
  • bbq pics 36 2014-01-04.jpg
    bbq pics 36 2014-01-04.jpg
    208 KB · Views: 906
  • bbq pics 32 2014-01-04.jpg
    bbq pics 32 2014-01-04.jpg
    214.9 KB · Views: 967
  • bbq pics 14 2014-01-04.jpg
    bbq pics 14 2014-01-04.jpg
    200.5 KB · Views: 997
  • bbq pics 30 2014-01-04.jpg
    bbq pics 30 2014-01-04.jpg
    240.5 KB · Views: 814
  • bbq pics 28 2014-01-04.jpg
    bbq pics 28 2014-01-04.jpg
    152.2 KB · Views: 830
  • bbq pics 27 2014-01-04.jpg
    bbq pics 27 2014-01-04.jpg
    155.2 KB · Views: 865
Next stop, changing out the power cord in the SI #3 and the Auber.  Thanks for the great idea here.  It is very easy, and definitely worth the effort.  It was 20 degrees here and the new cord performed well.

The Smokin It change was really easy.  Its just 3 wires.  I clipped the ground wire and put a female spade on it and a male on the new cold weather power cord. 


Attachments

  • bbq pics 39 2014-01-04.jpg
    bbq pics 39 2014-01-04.jpg
    232.1 KB · Views: 820
  • bbq pics 37 2014-01-04.jpg
    bbq pics 37 2014-01-04.jpg
    187.9 KB · Views: 850
  • bbq pics 23 2014-01-04.jpg
    bbq pics 23 2014-01-04.jpg
    259.6 KB · Views: 790
  • bbq pics 22 2014-01-04.jpg
    bbq pics 22 2014-01-04.jpg
    256 KB · Views: 796
  • bbq pics 21 2014-01-04.jpg
    bbq pics 21 2014-01-04.jpg
    151.5 KB · Views: 820
  • bbq pics 20 2014-01-04.jpg
    bbq pics 20 2014-01-04.jpg
    222.8 KB · Views: 826
  • bbq pics 19 2014-01-04.jpg
    bbq pics 19 2014-01-04.jpg
    222.4 KB · Views: 783
  • bbq pics 15 2014-01-04.jpg
    bbq pics 15 2014-01-04.jpg
    226.8 KB · Views: 832
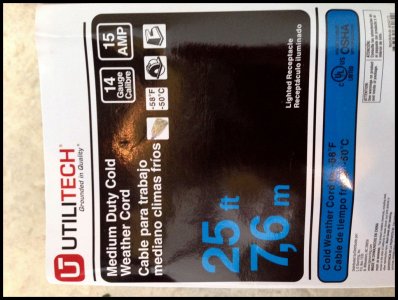
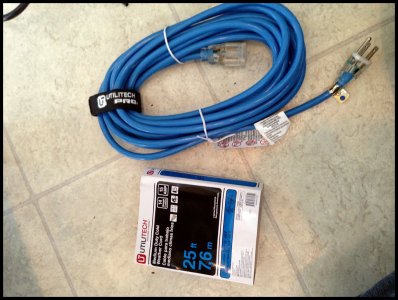
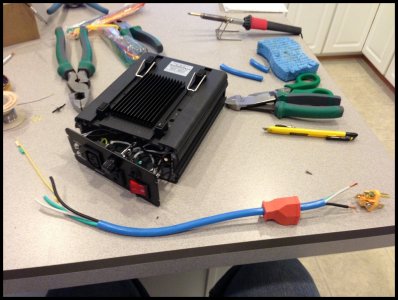
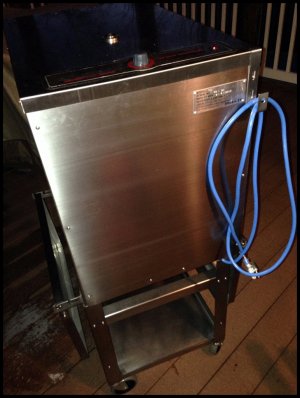
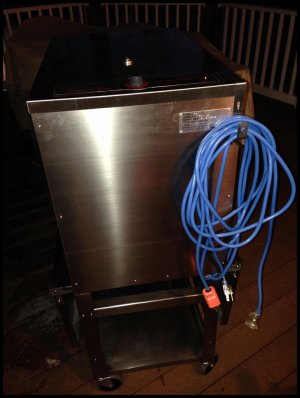
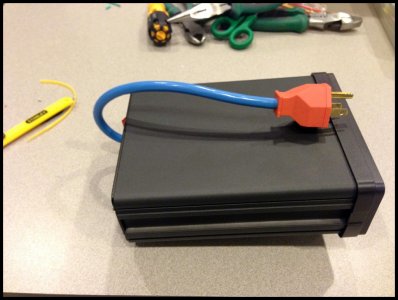
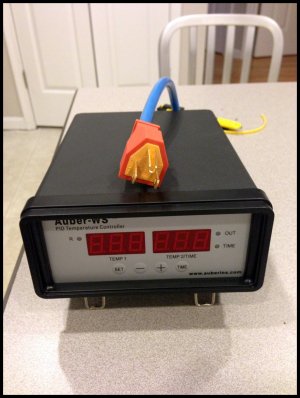
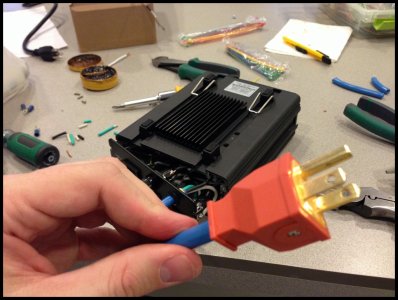
Next the Auber coldweather/short cord.  I primarily did this because I plan to keep the Auber inside and did not want to have a 15 ft cord attached to it all the time so I shortened it to about 8-12 inches. 

As others have said, this is a bit more tricky, because soldering is involved, but its really not that difficult.  You can do it! 


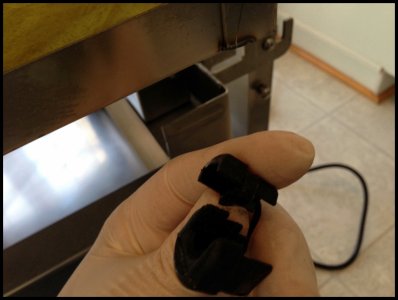
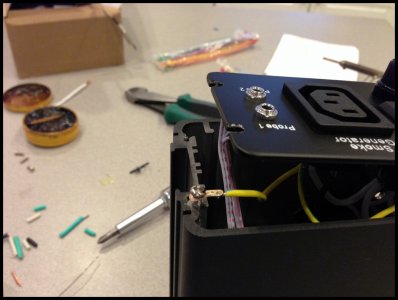
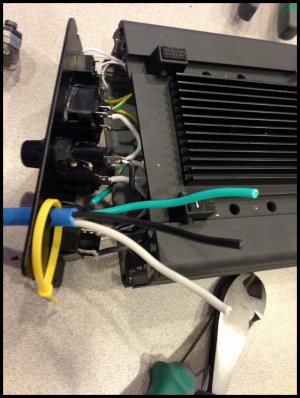
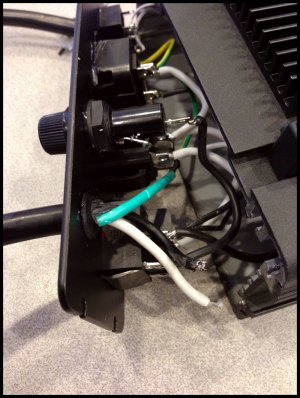
1. Pop the plastic covers off of the Auber and then unscrew the 4 screws holding the back of the unit together.
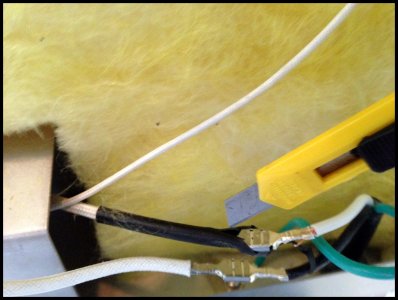
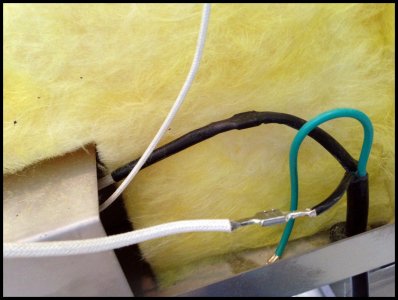
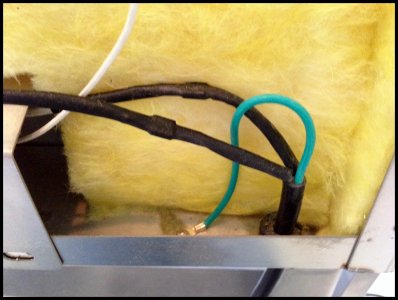
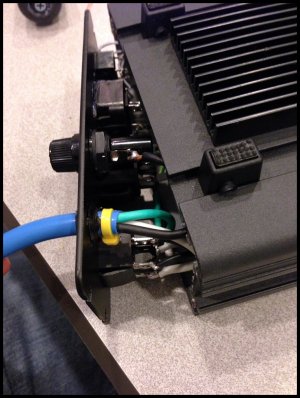
2. Follow the black, white, and green cables from the power cord to the terminals inside the auber.  Take a picture or refer back to this so you know where the new ones will be reconnected. 
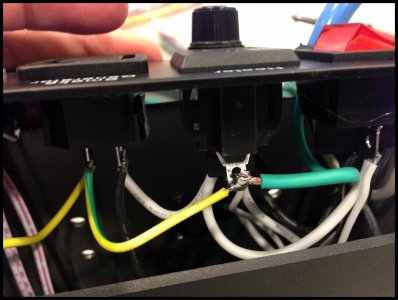
3. Remove the existing cables from the terminals with your soldering iron.  Just touch it to the wire.  It will heat the solder and you will see it change to a bright silver.  Tug lightly on the wire until it has been disconnected.  The wires to get hot when you hold the soldering iron to them, so you may want to use a pair of needle nose pliers to handle the wire it gets too hot to handle.  Do this for each of the 3 wires.
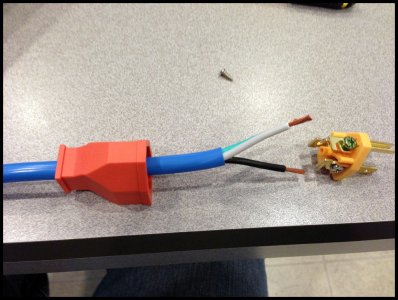
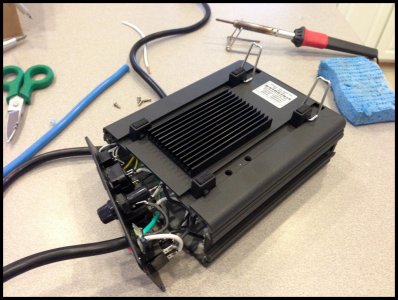
4.  Clip and strip the new power cable to the desired length.  I made it short, but YMMV.
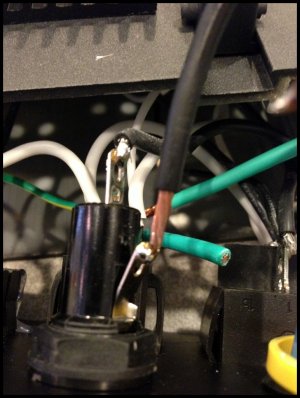
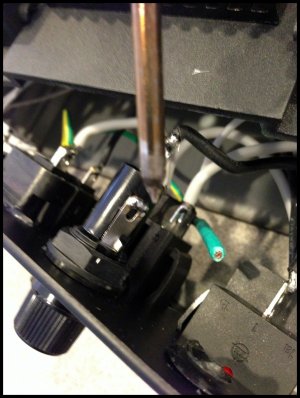
5.  Prep the new wire with a little bit of solder before connecting it to the post where the old wire was removed.  This makes re-connecting the wire a little easier and ensures you have good connectivity.  Do this to the terminal as well.  By adding a little solder to the terminal, it will make connecting the wire easier and ensure good connectivity.  Now hold the wire up to the terminal just as you did when you removed the wire and you will see the solder start to melt together between the wire and the terminal when you hold the soldering Iron up to it.  Try to keep the time you are holding the heat to the wire/terminal as short as possible because you do not want to damage the terminal or draw too much solder up the cable. 
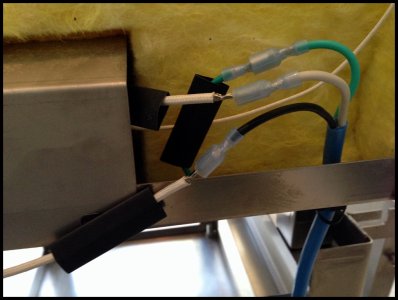
6.  I put zip ties and hot glued my new power cable into the grommet just to make sure it was very secure.
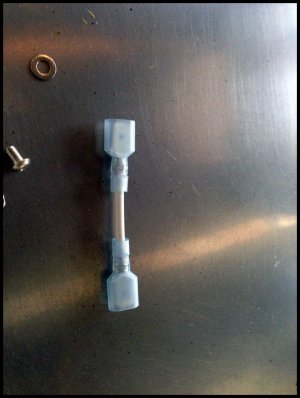
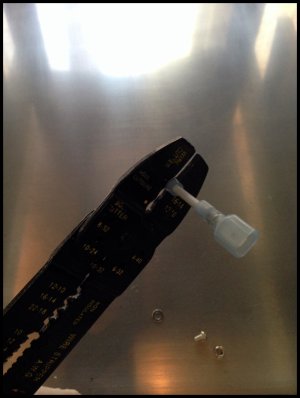
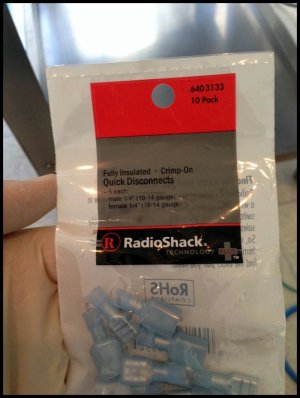
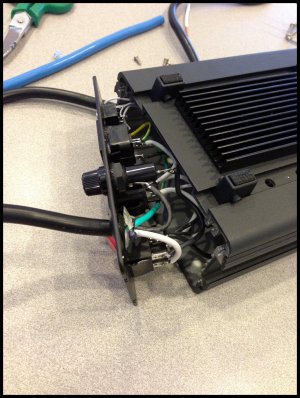
7.  Terminate the new power cables.  I used some plug ends I found at lowes which I like.  They have different colors.  I like Orange  :)  
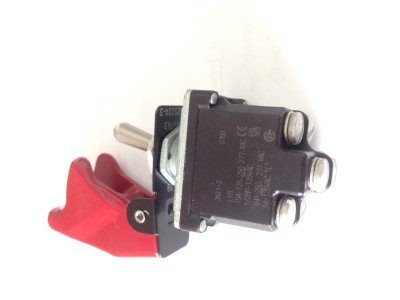
The inside of the plug will tell you which color wire conects to which terminal in the plug.


Attachments

  • bbq pics 52 2014-01-04.jpg
    bbq pics 52 2014-01-04.jpg
    177.3 KB · Views: 732
  • bbq pics 51 2014-01-04.jpg
    bbq pics 51 2014-01-04.jpg
    232.3 KB · Views: 752
  • bbq pics 50 2014-01-04.jpg
    bbq pics 50 2014-01-04.jpg
    255.4 KB · Views: 751
  • bbq pics 48 2014-01-04.jpg
    bbq pics 48 2014-01-04.jpg
    268.1 KB · Views: 767
  • bbq pics 49 2014-01-04.jpg
    bbq pics 49 2014-01-04.jpg
    239.9 KB · Views: 815
  • bbq pics 47 2014-01-04.jpg
    bbq pics 47 2014-01-04.jpg
    231.1 KB · Views: 688
  • bbq pics 46 2014-01-04.jpg
    bbq pics 46 2014-01-04.jpg
    254.7 KB · Views: 750
  • bbq pics 43 2014-01-04.jpg
    bbq pics 43 2014-01-04.jpg
    250.8 KB · Views: 751
  • bbq pics 42 2014-01-04.jpg
    bbq pics 42 2014-01-04.jpg
    304 KB · Views: 774
  • bbq pics 41 2014-01-04.jpg
    bbq pics 41 2014-01-04.jpg
    227.6 KB · Views: 818
When you re-assemble the box, make sure to reconnect the small grounding wire to the screw when attaching the back to the Auber.  I have a pic in here as a reminder.

I also attached a couple of the completed project.  The cables seems to be about the right length for me.  This is how I plan to store my #3 with the cord wrapped around the cord hook in the back as well as the extra 15 FT extension cord.  That is one other important note.  I ended up making all of the cords with the 1 25 FT cold weather extension cord.  You can see the one I purchased in the pics.  I really like it and I am glad I made the switch. 

Thanks again go to Steve, Chad, Johnny, Rick, Tony and all of you for the help / suggestions.
 

Attachments

  • bbq pics 07 2014-01-05.jpg
    bbq pics 07 2014-01-05.jpg
    261.2 KB · Views: 869
  • bbq pics 62 2014-01-04.jpg
    bbq pics 62 2014-01-04.jpg
    216.8 KB · Views: 692
  • bbq pics 60 2014-01-04.jpg
    bbq pics 60 2014-01-04.jpg
    195.4 KB · Views: 764
  • bbq pics 57 2014-01-04.jpg
    bbq pics 57 2014-01-04.jpg
    206.1 KB · Views: 694
  • bbq pics 56 2014-01-04.jpg
    bbq pics 56 2014-01-04.jpg
    224 KB · Views: 692
  • bbq pics 55 2014-01-04.jpg
    bbq pics 55 2014-01-04.jpg
    226.6 KB · Views: 697
  • bbq pics 54 2014-01-04.jpg
    bbq pics 54 2014-01-04.jpg
    256.1 KB · Views: 719
  • bbq pics 53 2014-01-04.jpg
    bbq pics 53 2014-01-04.jpg
    207.5 KB · Views: 707
Charlie,

Wonderful job. I am sure all will benefit from your hard work and great pictures.  Thanks for sharing,

Dave
 
Charlie:

You're done! Awesome.

Curious why the aluminum foil is left hanging out the front? Just wondering the reason and if it is some tip I should follow....

Steve
 
Polish Q said:
Curious why the aluminum foil is left hanging out the front?

Thanks Steve and Sarge!

That is my fully patented DripStop-o-Matic!  ;D

I actually got tired of dripping juices (cooked or raw) on the deck.  The dogs like it, but it stains, so I do not.  It does not catch them all, but if I pull the racks out a little to check the cook, it is enough that it catches some of the drippings.  I usually flip up the end a little to get it to extend out a little more.  I have also been taking a little outdoor table and sitting it in front of the smoker and placing a disposable full size hotel pan under the racks when I am done so I have a work table.

I have not figured out exactly how I will do it yet, but I plan to put in a sliding shelf under the front of the smoker that will extend out like a drawer would.  This create a place for me to work as well as catch those pesky drippings.  I like the side tables on the cart, but I would prefer one right in front under the drip pan attached to the smoker so I could extend it out and slide it back underneath when not in use.  I there is not really a place to attach drawer slides to the side of the cart without attaching another piece of material to the stainless steel sides of the cart.

I really like the stainless steel cart from Smokin-it, but the sides tables are not terribly sturdy. I am always afraid I am going to knock into it and collapse a side table by accident. 

Ill see what I can come up with over the next couple weeks.  Idea's and suggestions welcome.
 
I have heard a lot about the side tables not being sturdy. 

I think the are okay, but if bumped so they aren't latched, then you got a problem indeed.

That said I overcame this by slipping custom made wood clips that a shaped like a letter C that wedge in nicely to prevent the side tables from moving, and thus keeping them in place for the metal to do the work of holding the weight.

Ideally I agree there would be some latch that we're slip over or lock those puppies in place... But these little piece of wood a one heckuva insurance policy and greatly reduce risk of side tables collapsing.
 
I agree that the side tables are pretty good with the exception of not being able to lock them. You know I'm gonna ask you for a pic Steve!  Sounds like a good fix.  That would definitely make me feel a little more comfortable.  On Thanksgiving my cousin walked my the smoker and smacked into the side table and knocked himself pretty good and my tongs onto the ground.  He and the shelf were fine but made me nervous. 
 
Pics I will guarantee. Travel this week so posts may increase as stuck in hotel room... but getting anything done on my hobby won't occur.... But it's easy to jam anything in there!

I am thinking of trying an apple pie on the smoker... Dunno why just crazy thought stuck in my mind ... But once there it's trapped!!!
 
Okay ... for now this is all I have ... However I will take photos this weekend to show this mod I am about to apply to my SI3!!!!
 

Attachments

  • image.jpg
    image.jpg
    240.7 KB · Views: 771
Polish Q said:
Okay ... for now this is all I have ... However I will take photos this weekend to show this mod I am about to apply to my SI3!!!!

Looks like a "Master Arm" switch to me, Steve!  Ha!  Are you going nuclear??  LOL!
 
Back
Top