You are using an out of date browser. It may not display this or other websites correctly.
You should upgrade or use an alternative browser.
You should upgrade or use an alternative browser.
How to install a permanent Auber temperature probe
- Thread starter DivotMaker
- Start date
DivotMaker
New member
Sweet baby cheeses! Sorry I'm behind on this one! Looks like an engineers convention gone wild! lol.
Now, I really think you all are way over-thinking this! Here's the deal - Auber recommends the probe be as high as possible, but recommends the location I used in my instructions, based on the Bradley. After practical use, I realize that is too low...it interferes, at times, with the meat. So, I would place it about 1" from the top, dead center. I disagree with the offset, that some have proposed, as I think you run the risk of air pockets or unstable heat toward the sides (I agree with Auber on this one).
As for the spacer: I liked nylon, with a 5/16" ID, because that's what the base of the probe is, and is not subject to deterioration like metal. Metal might also re-introduce the effect that nylon counters - heat sink (that's why they use nylon for the base).
So, install the probe 1" from the top, dead center, then do an autotune. Problem solved, and great temps to follow!
DivotMaker
New member
Walt said:Where did you find the elusive 1 inch nylon spacer with a 5/16" ID hole?
Tractor Supply, Walt. Lowe's has them, too, in the specialty hardware drawers.
CUTiger80
New member
Tony,
Your "wake up alarm" timing was perfect (kind of). I am going to install my probe and autotune today. I was already going to stop at Lowes and do some more "engineering" to find a spacer made of nylon. I had thought to myself just this morning that the metal spacer may not be best for the very reason that you gave. I will report back with more specific information on what I find at Lowes and/or Tractor Supply.
But don't blame us engineers for trying to make this install "perfect". That is what we do. We all blame you. If you had not been asleep at the wheel with all of this knowledge bottled up, we would not have had to think this out so hard. LOL
As always, thanks for your help!!
DivotMaker
New member
SuperDave said:The spacer is optional, no? If the spacer wasn't used, would the nylon piece on the probe actually be in the smoker box?
Dave, the threaded section is really long - designed to go through the double-wall of the Bradley smoker. You don't have to install a spacer, but you won't be happy with the results. That extra inch of threads, sticking out from the back of the smoker wall, is unsightly and gets in the way! I did it that way first, and found myself running to Lowe's for the spacer!
CUTiger80
New member
I found the spacer at Lowes in the specialty hardware drawer marked Nylon something. I bought the switch from Amazon for about $7 including shipping. I Will post pictures & links later. The hardest part is getting the probe conductor & power wire through the same cord grip. I gave up @10:00 last night. Will attack again this morning. May decide to drill another hole (yuk) instead of take the chance on damaging the probe conductor.
CUTiger80
New member
Below is the link to the switch. It is a common DPDT panel mount 2-position toggle switch with screw terminals rated for 15A.
I did end up drilling another hole in the bottom for the temperature probe wire in order to provide separation between it and the power. Made for an overall cleaner installation IMO.
http://smile.amazon.com/gp/product/B00K858QG2/ref=oh_aui_detailpage_o04_s00?ie=UTF8&psc=1
I did end up drilling another hole in the bottom for the temperature probe wire in order to provide separation between it and the power. Made for an overall cleaner installation IMO.
http://smile.amazon.com/gp/product/B00K858QG2/ref=oh_aui_detailpage_o04_s00?ie=UTF8&psc=1
CUTiger80
New member
I installed the permanent probe and the controller bypass this past weekend. I will address the temperature probe in this post and the bypass in the appropriate category "How to bypass the analog controller".
I have posted photos below showing several steps in the process.
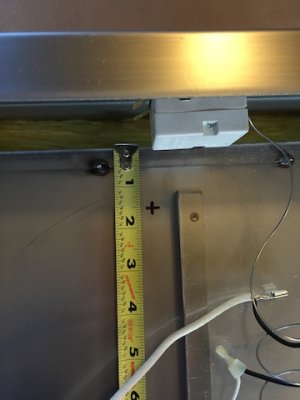
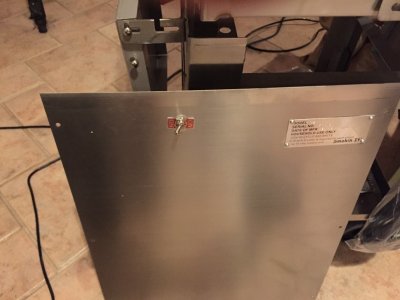
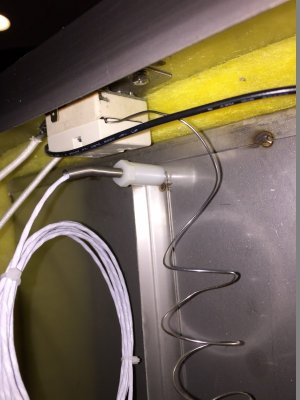
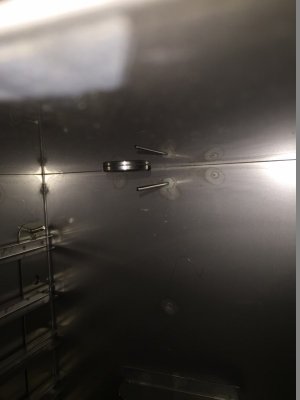
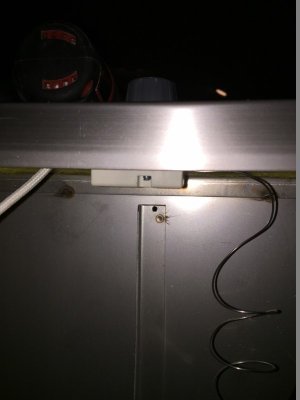
I decided to place the probe 1-3/4" below the top of the box near the center (see photo). This was mainly because the metal tends to be harder near the bend where it transitions from back to top. I removed the smoker door and latches (they lift straight up) and placed the smoker on its front to have more leverage when drilling. I used a center punch to indent the sheet metal and drilled a smaller pilot hole first and then the 5/16" hole. Let the drill turn slowly and be patient because this stainless is hard. I also used a cutting oil to keep the bit cooler, but regular motor oil will work.
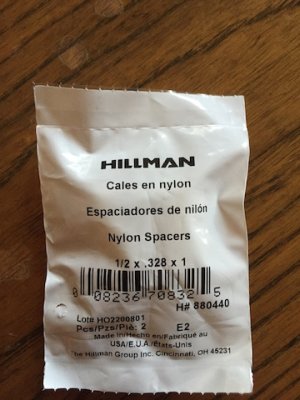
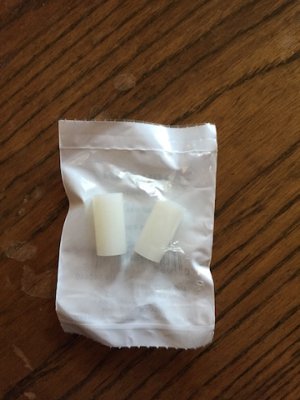
I bought nylon spacers from Lowes in the Speciality Hardware section. They were in a drawer marked Nylon something (don't remember exactly). The photos below show the package (front & back).
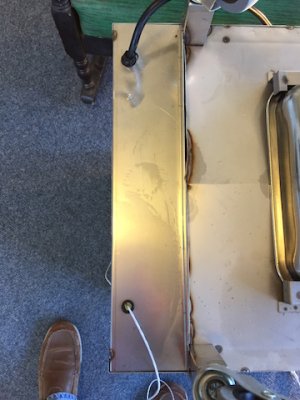
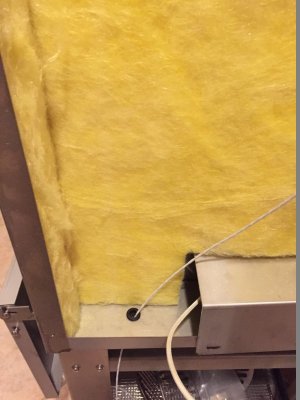
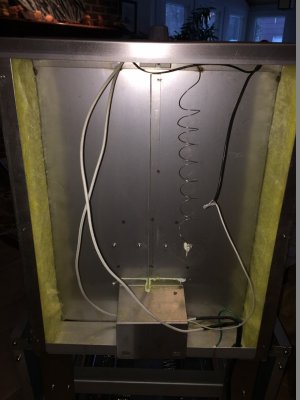
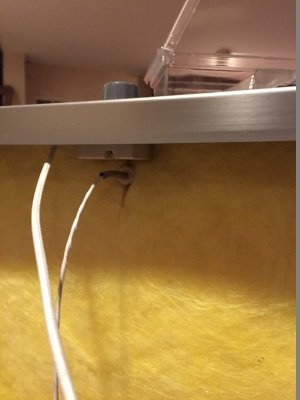
After installing the probe in the back wall, I decided to drill another hole in the bottom for the probe cable. I tried briefly to fit the cable in with the power cord but it was too tight for my liking and I was afraid that the probe cable would become pinched. Also, I am not a big fan of running control or sensor cable with power. If you decide to go this route, you will need to make sure that the hole you drill is at least as large as the connector on the probe. You should also install a rubber grommet (also available from Lowes in one of the Speciality Hardware drawers) in the hole to prevent the cable from being damaged by the edge of the stainless. (Note that in the photo below the smoker is turned top down so that the drilling is easier).
I have posted photos below showing several steps in the process.
I decided to place the probe 1-3/4" below the top of the box near the center (see photo). This was mainly because the metal tends to be harder near the bend where it transitions from back to top. I removed the smoker door and latches (they lift straight up) and placed the smoker on its front to have more leverage when drilling. I used a center punch to indent the sheet metal and drilled a smaller pilot hole first and then the 5/16" hole. Let the drill turn slowly and be patient because this stainless is hard. I also used a cutting oil to keep the bit cooler, but regular motor oil will work.
I bought nylon spacers from Lowes in the Speciality Hardware section. They were in a drawer marked Nylon something (don't remember exactly). The photos below show the package (front & back).
After installing the probe in the back wall, I decided to drill another hole in the bottom for the probe cable. I tried briefly to fit the cable in with the power cord but it was too tight for my liking and I was afraid that the probe cable would become pinched. Also, I am not a big fan of running control or sensor cable with power. If you decide to go this route, you will need to make sure that the hole you drill is at least as large as the connector on the probe. You should also install a rubber grommet (also available from Lowes in one of the Speciality Hardware drawers) in the hole to prevent the cable from being damaged by the edge of the stainless. (Note that in the photo below the smoker is turned top down so that the drilling is easier).
Attachments
-
 Fixed Probe Location.jpg59.8 KB · Views: 631
 -
 Fixed Probe cable exit hole.jpg83.5 KB · Views: 716
 -
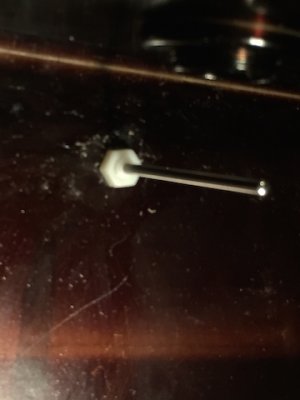 Fixed Probe installed (inside).jpg46 KB · Views: 617
 -
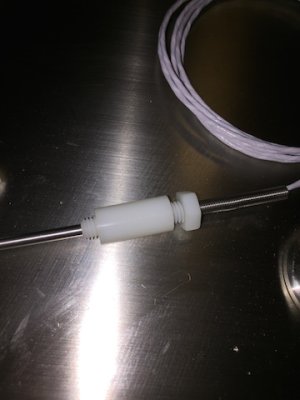 Fixed Probe with spacer.jpg56.4 KB · Views: 612
 -
 2014-12-18 Nylon Spacer (2).jpg65.3 KB · Views: 593
 -
 2014-12-18 Nylon Spacer.jpg59.8 KB · Views: 550
DivotMaker
New member
Nice install, Ravel!
Walt
Active member
I did the same installation as Ravel. Very simple. Parts list as follows:
1 Permanent Mount temperature probe
1 1" long nylon spacer with at least a 5/16" ID
1 1/2" titanium drill bit (used to drill the exit hole for the probe)
1 1/2" rubber grommet (for the hole you drill so the sharp edges wont dammage the
wire that us fed through. The hole needs to be 1/2" so the RCA plug can fit through)
1 5/16" drill bit (I placed the hole 1" from the top and slightly to the left of the center
support like the picture above of CUTiger)
DivotMaker
New member
Good job, Walt! Let us know how it works out.
SuperDave
New member
So, who owns the record for most drill bits required to install their permanent temp probe? I broke 4 small bits and went through another 4 or 5 getting a hole punched through the box and the back panel. The most definitive lesson to date with the new smoker is that I never want to drill another hole in this thing again!!!!
BTW, on my model 4, the plug that goes to the Auber required a 7/16" hole to get through the back panel.
BTW, on my model 4, the plug that goes to the Auber required a 7/16" hole to get through the back panel.
DivotMaker
New member
SuperDave said:So, who owns the record for most drill bits required to install their permanent temp probe? I broke 4 small bits and went through another 4 or 5 getting a hole punched through the box and the back panel. The most definitive lesson to date with the new smoker is that I never want to drill another hole in this thing again!!!!
BTW, on my model 4, the plug that goes to the Auber required a 7/16" hole to get through the back panel.
Hehe... Yeah, drilling stainless is not for the timid! The key is a center-punched spot to start the drill bit, a new bit, and plenty of machine oil - and lots of pressure! Can't try to "baby" a bit through that stuff!
DivotMaker
New member
The homemade spacer should be fine, Dave - great improvisation! It's mostly nylon/plastic, so should be OK I would think.
Plan2build
New member
I installed my permanent probe today 8) Drilling the stainless was not difficult, and if you take your time and are patient you can get through it easily. I used a punch to mark the hole position and then used a small pilot bit to drill through. I used no oil or special bits!!! It is not necessary in my opinion. It is very important to keep the bit cool, so I drilled for 5-10 seconds, stopped and dipped the bit in a cup of cool water, then continued. I used my basic Milwaukee bits in my battery powered drill. The holes were very easy but, again, take your time and don't rush. The deburring was done with a step bit from each side, drilling just enough to knock the rough edge down.
I took Tony's advice and measured down about an inch from the top...this put me at a spot weld on the center brace (see photos). So I went even higher, about 3/4 of an inch from the ceiling of the inside chamber. This allowed me to clear the spot weld and gave enough clearance to be able to wipe the probe after use.
I drilled out the bottom and added a grommet, again through the recommendations of those before me!!
My bypass switch is a simple DPDT that I mounted on the back panel....if I were to do it again, I would do a top mount as it would be a heckuva lot easier to re-install the insulation. But I already drilled the hole, so I stuck with the plan. I did not get shots of the bypass wiring, but it is as others have posted. I did cable tie the leads together along their length to keep it clean and to help when putting the insulation back in. My bypass wiring was 14 Stranded THHN.
Next step is to get my auber autotuned, get the smoker cured, and then start smoking some meat!!! I will update as I move along!! Thanks to all on these forums for the help for this newb.....
P2B
Attachments
-
 IMG_2849 (600x800).jpg103 KB · Views: 503
 -
 IMG_2847 (800x600).jpg187.9 KB · Views: 541
 -
 IMG_2846 (600x800).jpg112.1 KB · Views: 521
 -
 IMG_2844 (600x800).jpg63.7 KB · Views: 488
 -
 IMG_2842 (600x800).jpg77.8 KB · Views: 521
 -
 IMG_2840 (600x800).jpg85.4 KB · Views: 525
 -
 IMG_2836 (600x800).jpg73.7 KB · Views: 544
 -
 IMG_2833 (600x800).jpg98.4 KB · Views: 537
 -
 IMG_2850 (600x800).jpg87.5 KB · Views: 545
Thanks for the pics Gregor! I'll be installing a permanent probe in my smoker soon. Do you think installing the bypass switch on the bottom of the smoker would be doable? I'm thinking that would be a better location because it's out of the weather, don't interfere with the cover, etc... I'm not sure I've heard of anyone trying to do it on the bottom though...
Similar threads
- Replies
- 3
- Views
- 200
- Replies
- 4
- Views
- 798
- Replies
- 2
- Views
- 647