Hello Smokin-It Nation !!
We are currently working on the instructions for the new Bella smoke generator. Because we have sold some of these units already I thought I would share some information and photos to help people get started.
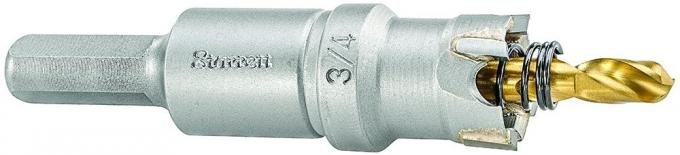
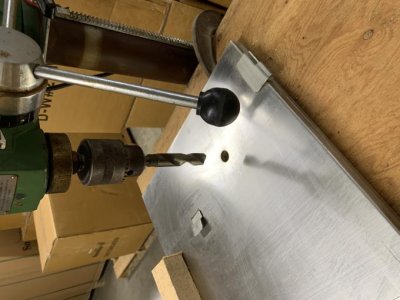
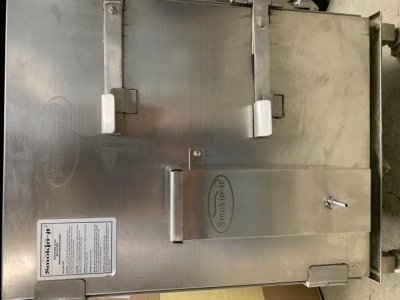
1. You will need to drill a 3/4" dia hole on the smoker for the generator smoke tube. We picked the door as it is easy to remove from the smoker and it can be setup on a drill press. Please make sure you have a good sharp drill bit and you need to drill very slowly. The attached photo's are a door for a model 2 or 3 smoker. We drilled 5" up and 5" over looking left to right. This position will allow enough space to access the door latches. Please note you should remove your wood box from the smoker as it is not needed when using the generator.
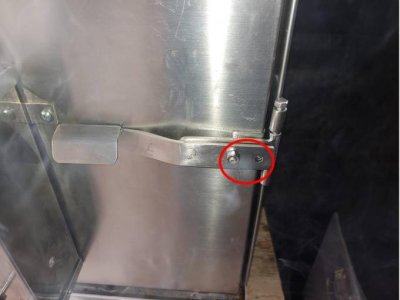
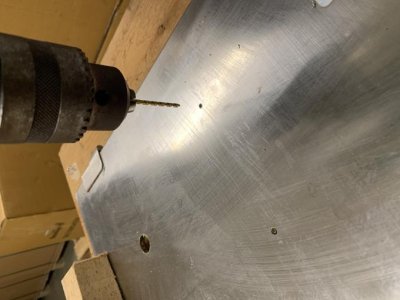
2. Next you need to drill (2) 5/32" dia. pilot holes thru only the exterior face of the door (NOT COMPLETELY THRU) these will be used to attach the two stainless steel self tapping screws we supply for the generator support bar.
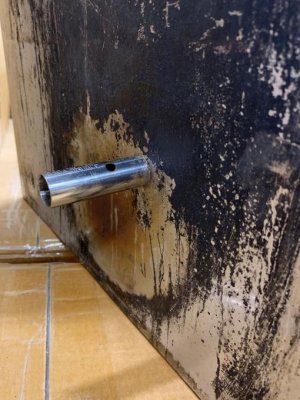
3. Insert the smoke tube into the body of the smoke generator with the slotted end placed slightly outside and the twist to lock in place. You can now insert the smoke tube into the 3/4" dia hole you drilled and then attach the (2) self tapping screws to hold the smoke generator body in place.
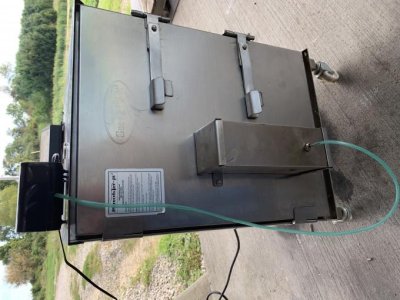
4. Connect the tubing to the air pump and the other end of the tube to the smoke generator nipple.
5. Load the smoker generator with dry wood pellets and then turn on the air pump to its highest setting.
(Currently we are sending approx. 1 lb. of wood pellets with every order.)
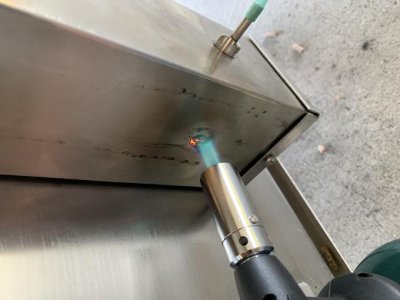
6. Using a small hand held torch you can lite the wood by using the two side 7/16" dia. holes. that are located on the body of the generator.
7. You should start to see smoke coming from the top vent hole on your smoker after a short period of time. I would leave the air pump on high for approx 5 min. to insure that you have a good burn going. After that you can adjust the pump to reduce the amount of smoke produced.
8. The smoke generator is made from 304 stainless and you will need to clean the generator depending on use to remove the buildup of tars. I have found the drain cleaner works the best to remove these. Please sure to wash off the generator completely with water when done with the drain cleaner.
We will be offering pre-drilled smoker doors for the models #1, #2 and #3 very shortly for those of you that do not what to drill holes in your smoker. Pricing will be posted as soon as possible. We will also have pre-drilled doors for the model #3.5, #4 and #5 in the next few months. You can email me directly or cal me at 260.417.9951 if you have any other questions or concerns.
We are currently working on the instructions for the new Bella smoke generator. Because we have sold some of these units already I thought I would share some information and photos to help people get started.
1. You will need to drill a 3/4" dia hole on the smoker for the generator smoke tube. We picked the door as it is easy to remove from the smoker and it can be setup on a drill press. Please make sure you have a good sharp drill bit and you need to drill very slowly. The attached photo's are a door for a model 2 or 3 smoker. We drilled 5" up and 5" over looking left to right. This position will allow enough space to access the door latches. Please note you should remove your wood box from the smoker as it is not needed when using the generator.
2. Next you need to drill (2) 5/32" dia. pilot holes thru only the exterior face of the door (NOT COMPLETELY THRU) these will be used to attach the two stainless steel self tapping screws we supply for the generator support bar.
3. Insert the smoke tube into the body of the smoke generator with the slotted end placed slightly outside and the twist to lock in place. You can now insert the smoke tube into the 3/4" dia hole you drilled and then attach the (2) self tapping screws to hold the smoke generator body in place.
4. Connect the tubing to the air pump and the other end of the tube to the smoke generator nipple.
5. Load the smoker generator with dry wood pellets and then turn on the air pump to its highest setting.
(Currently we are sending approx. 1 lb. of wood pellets with every order.)
6. Using a small hand held torch you can lite the wood by using the two side 7/16" dia. holes. that are located on the body of the generator.
7. You should start to see smoke coming from the top vent hole on your smoker after a short period of time. I would leave the air pump on high for approx 5 min. to insure that you have a good burn going. After that you can adjust the pump to reduce the amount of smoke produced.
8. The smoke generator is made from 304 stainless and you will need to clean the generator depending on use to remove the buildup of tars. I have found the drain cleaner works the best to remove these. Please sure to wash off the generator completely with water when done with the drain cleaner.
We will be offering pre-drilled smoker doors for the models #1, #2 and #3 very shortly for those of you that do not what to drill holes in your smoker. Pricing will be posted as soon as possible. We will also have pre-drilled doors for the model #3.5, #4 and #5 in the next few months. You can email me directly or cal me at 260.417.9951 if you have any other questions or concerns.
Attachments
-
 smoke generator drilling large hole.jpg44.7 KB · Views: 532
 -
 smoke generator drilling small holes.jpg37.7 KB · Views: 496
 -
 smoke generator smoke tube thru door.jpg63.1 KB · Views: 539
 -
 smoke generator mounted to door.jpg35.6 KB · Views: 531
 -
 smoke generator all setup.jpg55.9 KB · Views: 599
 -
 smoke generator torch lite.jpg34.2 KB · Views: 611