bartjoebob
New member
Couldn't find a thread on this so decided to make one with tips and other key findings as I did mine. My smoker runs a little hot. That magic range of 225-230deg is more like 235-240 on my analogue dial unit. Over the last year I've been guessing whereabouts the 225deg mark is since the lettering on the faceplate had been worn out by the dial. So it was time to order a replacement faceplate from the SI store. When it arrived I noticed the new design is a little easier to read but I still had a plan to prevent it from ever wearing out again... automotive paint protection film, but more on that later.
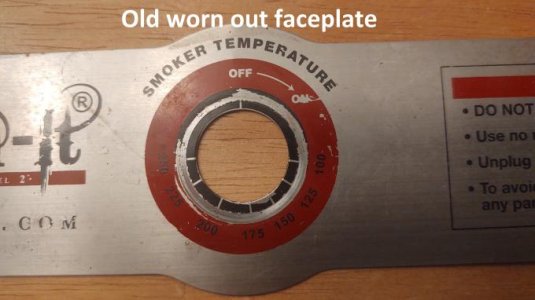
Here's what we were working with on the old face plate...
On to the Install...
Step 1: Sorry no pictures of this step. Using a small sturdy putty knife or large screwdriver with thin tip, gently raise the lip of the red plastic Power-On lamp away from the faceplate in all directions. This red plastic light insert is ribbed and I found rocking it back and forth with needle nose plyers wobbled it out while lifting. Be careful not jerk too hard or let it fly out under tension, you'll likely break the wires. There is about 1-1/2" of spare wire for play inside the unit once the light fixture is backed out.
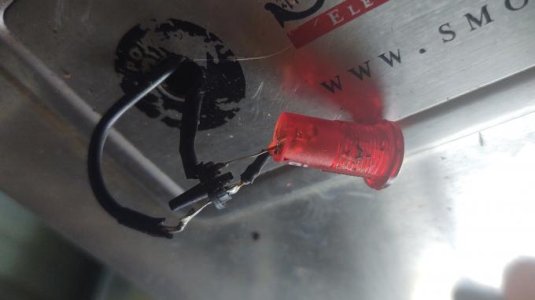
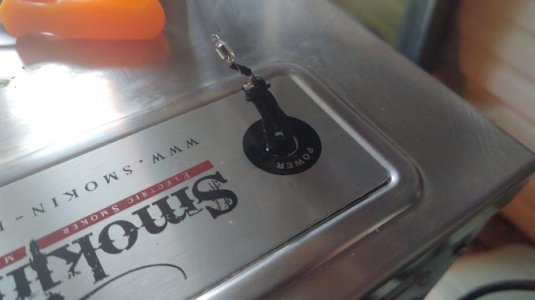
Step 2: Separate the red lens from the black base. This is required so the faceplate can slide over the lamp assembly. NOTE: you cannot remove the whole bulb assembly from the wires. They are soldered on, not plugged onto the posts. As you can see in my pciture I removed some of the heat shrink to learn this so I'll rewrap in electrical tape. There are little black detent tabs on the sides of the red lens. Depress these with a punch or small eyeglass screwdriver and work the red lens away from the base. I held the black tab under the base between the wires with needle nose plyers while working the red lens off.
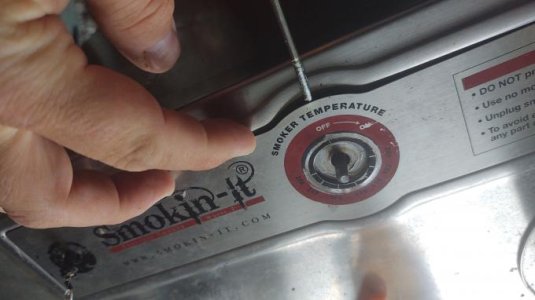
Step 3: Find any raised lip on the base plate and use your screwdriver/putty knife to carefully work the old face plate off so as not to scratch the stainless steel
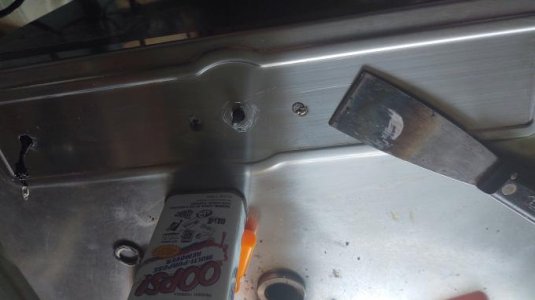
Step 4: use a hair dryer on low and scrape up the residual adhesive strip. I would caution against a heat gun here. Even the hair dryer significantly heated the metal and was more than ample to take up the adhesive with a putty knife. Heat gun could easily overheat and risk damage. Clean thoroughly with adhesive remover
Step 5: Apply new Adhesive strip to backside of the new faceplate. Cut out hole for power lamp assembly
Step 6: Remove backing strip from adhesive and reapply the new face plate to unit making sure to align it square and as close to original position as possible. You really only get 1 shot at this, the adhesive strip wont survive multiple peel-ups and the plate can bend prying it back off.
Steps 7 + 8 + 9: reinstall the red les onto the lamp base, reinsert the assembly back into the unit. Do not hammer it in, wobble it in with your palm. Replace the control knob
Tips and tricks
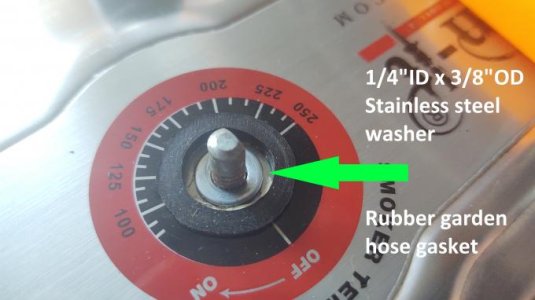
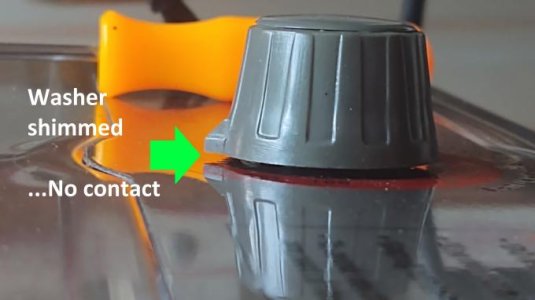
Use a 1/4"ID by 3/8"OD stainless washer or two over the post to shim up temp control knob so it doesn't contact the faceplate at all. The image below also shows a rubber hose gasket siliconed on the faceplate for a little extra preventative to keep water intrusion out.
I bought a strip of automotive paint protection film off amazon and applied it to the face plate prior to installing it. This really hits the nail on the head with this issue. The lettering and graphics on the faceplate are practically indestructible and now UV-protected. Some of these PPFs are even self healing so if they get scratched they heal in the sunlight. This is a permanent fix even for weathering. Picture here shows the PPF applied to the face plate and gap the washer creates
Anyway hope all this helps keeping your unit looking like new (on the outside at least) ;D

